This
page shows the latest upgrades to the El Camino.
Jan
2012 to Jan 2013.
July
2006
the car got a name: 'Elkenstein'
There are so many parts on it now, from all sorts of different vehicles.
Even though it dies once in a while, it keeps coming back to life.
Click on the pictures
to see larger views.
Use your browser's 'back' button to return to
the page.
January 2006 to February 2007
This year will hopefully see a lot more driving, and car shows. Overdrive is the first order of business.
Everything is healing fine. I should be back to work for part days in late February. Heavy auto work is months away.
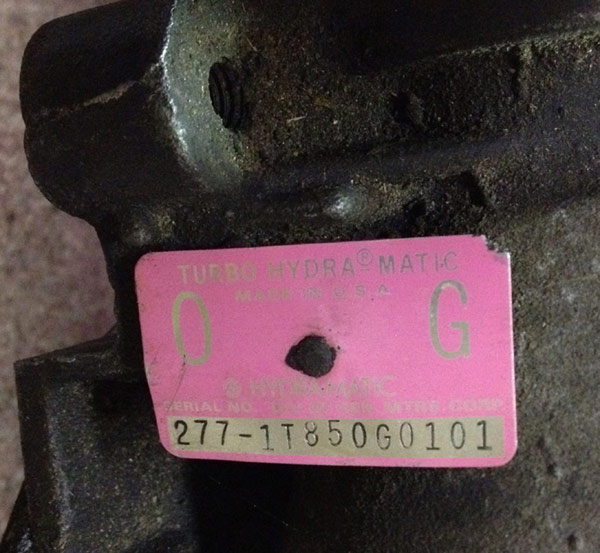
Here is the tag on the unit. It also has the torque converter, tube and dip stick, throttle control cable, and electrical plug. The tag number has a large O and G on either side of the rivet, then 277-1T850G0101
Do you know how to decode this number? Thanks for any info.
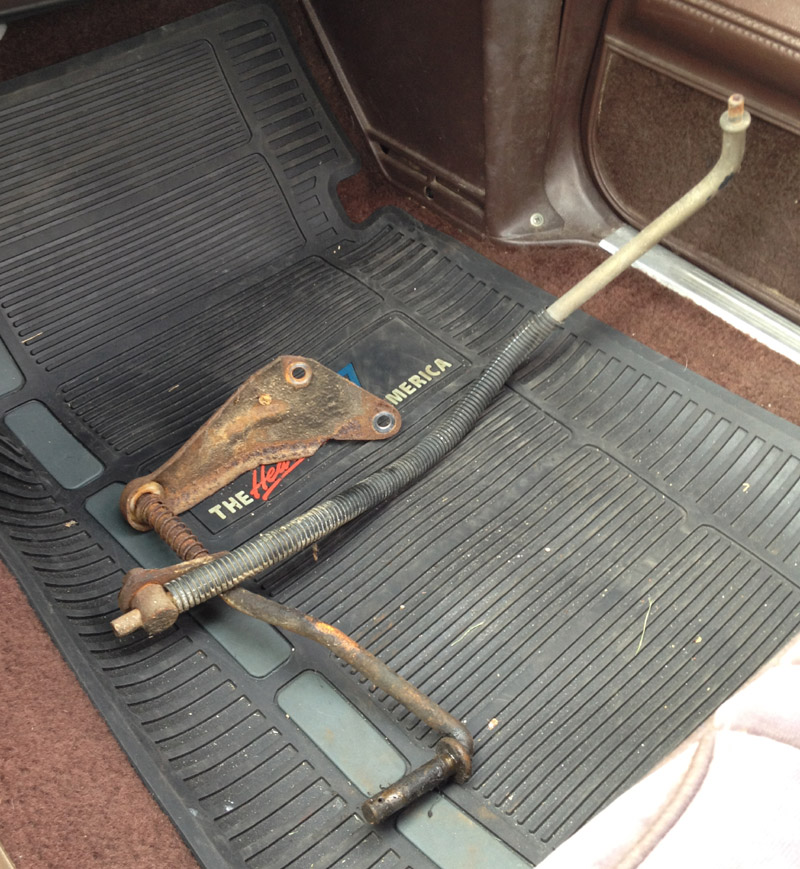
Here is the frame extension (hanging left) and the new Iceman Cross Member (hanging right). Both sanded, primed, and high heat engine paint, semi gloss black.
I would love nothing more than to put the rear upper and lower control arms from Iceman on the car too.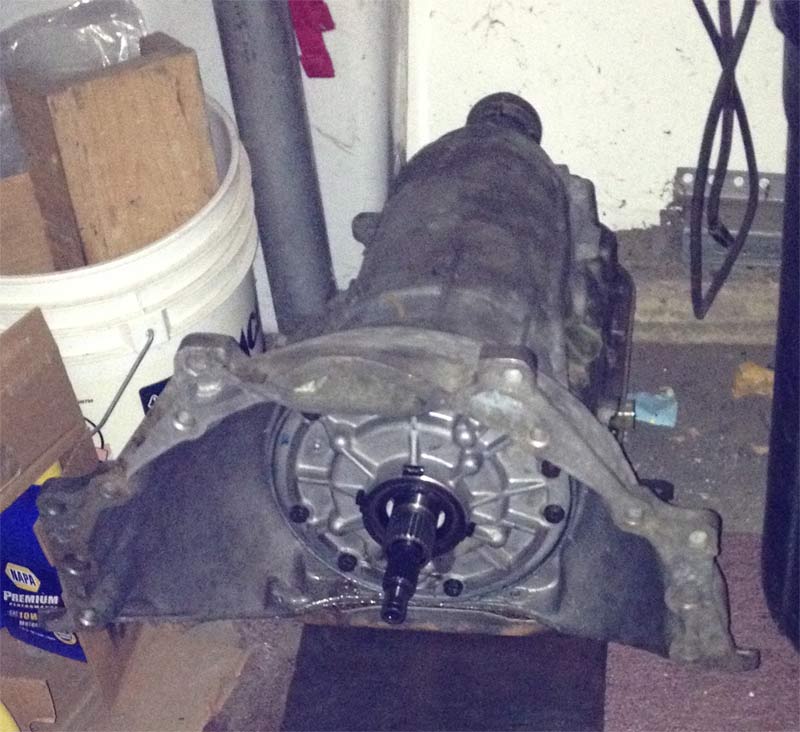
3/20/12
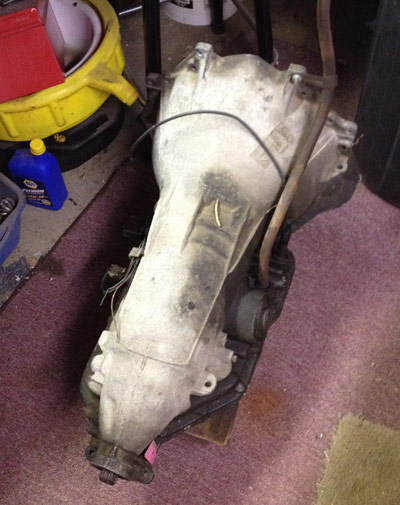
I picked up the transmission from the builder, Bill Schreiber in Aurora, IL, Transmissions, Etc. I have a new super servo in it, it does not have a shift kit, but it has a much larger band, and basically Grand National specifications. I don't know about working on the transmissions myself (hence, passing this job on to someone who knows what they are doing, and has 30 years of experience doing it), so I can't tell you the particulars. He gave me a 2 year guarantee. Total cost for the core and the rebuild was $660.00 Exceptional for what I got, I think.
I am shopping for the right torque converter now.
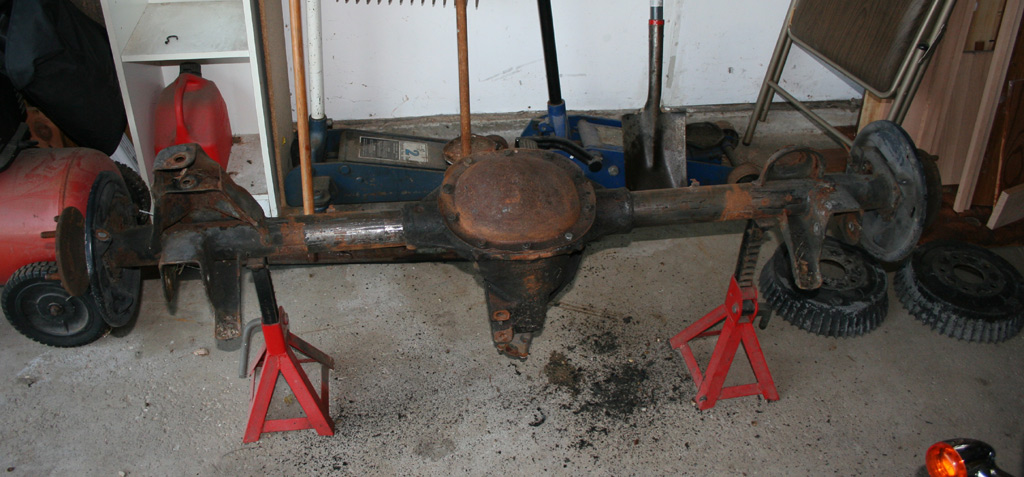
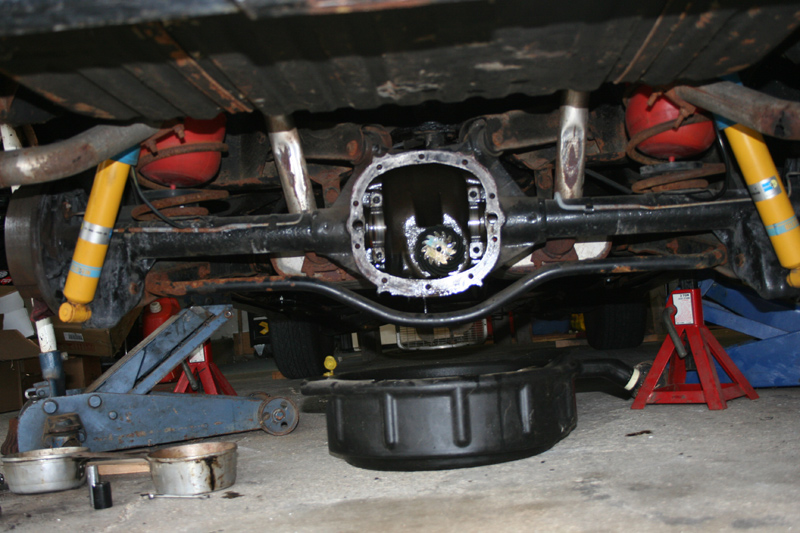
Just purchased an F-Body rear axle with a Posi for $50. It is reported
to have 3.23 gears (same as what I have) and 26 spline axles. I want to
take the posi unit from it and put it in the El Camino.
I opened it up, and it was not a Posi. Lesson learned, I should have
checked it out better on site. I was physically unable to root around
too much
though. And I wanted them to just get it in the Elky at that price. Looks
to be an open 2.5x differential.
For Sale $50 Sold...

Nope .... Just like the others I have bought. Warped and turned before to within 1 mm of spec. Good idea for the short term, but that's why these aren't available any more on the aftermarket I suppose.

Differential Assembly Instructions
Differential Installation Instructions
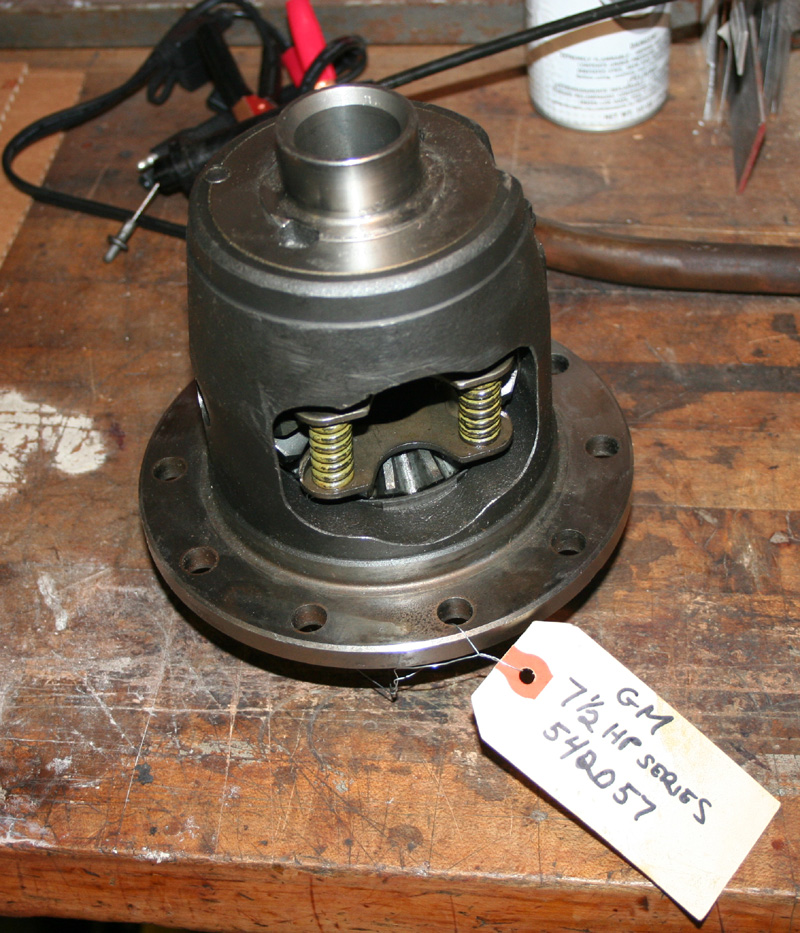
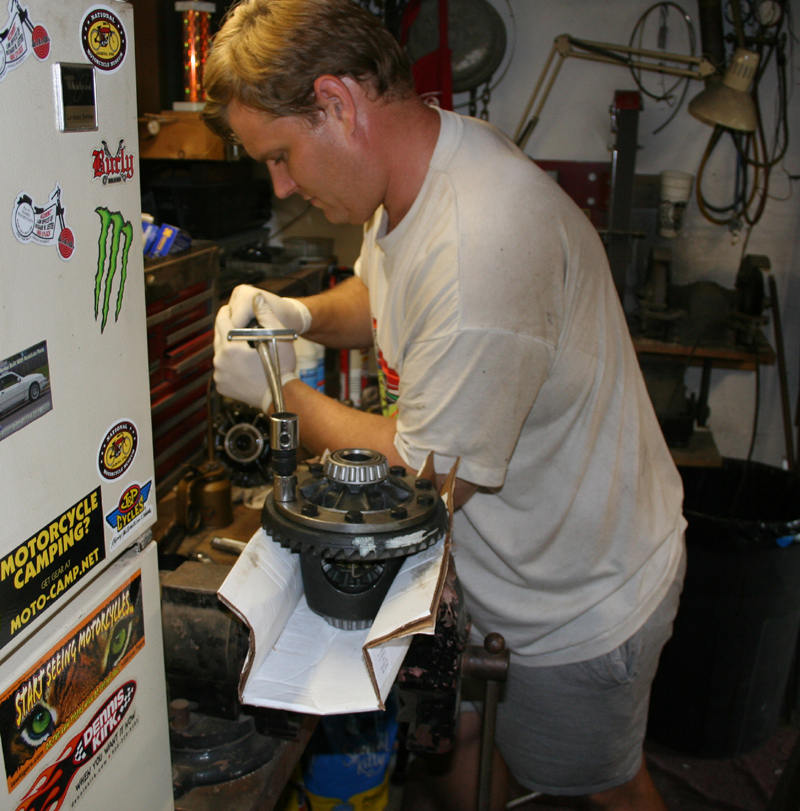
4/1/12 Purchased a Posi unit on ebay for $199. I have 3.23 gears in the Elky now, and this will go right in.
Info:
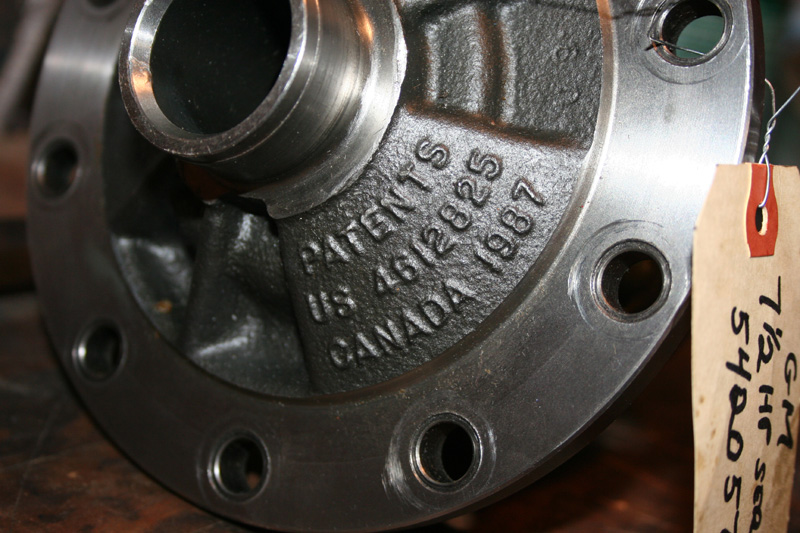
Auburn High Performance Series Differential 542057
Application: GM 10 Bolt
Ring Gear Diameter: 7.5" & 7.625"
Carrier: 3.23:1 & numerically higher
Side Gear Spline: 26 Teeth
Model Years: 1976-1988
Bearing Cone: LM501349
Bearing Cup: LM501314
Product Description
From over the road daily driving to muddy trails and back roads,
Auburn Gear's high bias Pro Series and High Performance Series limited-slip
differentials
outperform standard OEM differentials hands down. They deliver more traction
and faster engagement for controlled power transfer and lightning-fast
reaction to changing load conditions. No matter what your application
- performance or passenger cars, light duty trucks, vans, sport utility
vehicles,
off road, or recreational vehicles - the Auburn Gear limited-slip differential
is engineered to provide smooth torque-sensing operation with bias ratios
to meet your performance needs. This superior performance is achieved
through an innovative cone clutch design which transfers more power
to the high-traction
wheel for quick acceleration and tight cornering. Auburn Gear has a full
range of differentials for Chrysler, Ford, GM and Toyota vehicles. All
are also compatible with all ABS and electronic controls.
How the Auburn Gear Limited-Slip Differential Works
The highly efficient torque transfer capability of the Auburn Gear limited-slip differential is achieved through the use of cone clutches coupled to beveled side gears. As torque is transmitted through the differential side gears to the axle shafts, the side gear separating forces and spring pre-load firmly seat the cones into the differential case. The cone design, along with the applied force, determines the torque transfer capability of the differential. When torque levels decrease, as in a cornering maneuver, the gear separating forces also decrease, allowing the axle shafts to rotate independently. All Auburn Gear limited-slip differentials are designed to provide the maximum amount of torque transfer without compromising the performance requirements of a vehicle in situations where torque transfer is not required.

I installed the new gear indicator plate that says "Automatic Overdrive" for the transmission swap 4/15/12
The car goes in to Ron's Automotive to get the work done in the morning.
I bought a 1650 Stall (medium) torque converter from Auto Zone for $50 exchange. This was the part number for a Grand National, 1987 with the 200-4R. They had low and high stall too. The core charge was $150. Good thing I had the core from the trans I bought.

This shot shows the cross member really well. Lots of room for exhaust there now. Plenty of room for both pipes just on the passenger side.
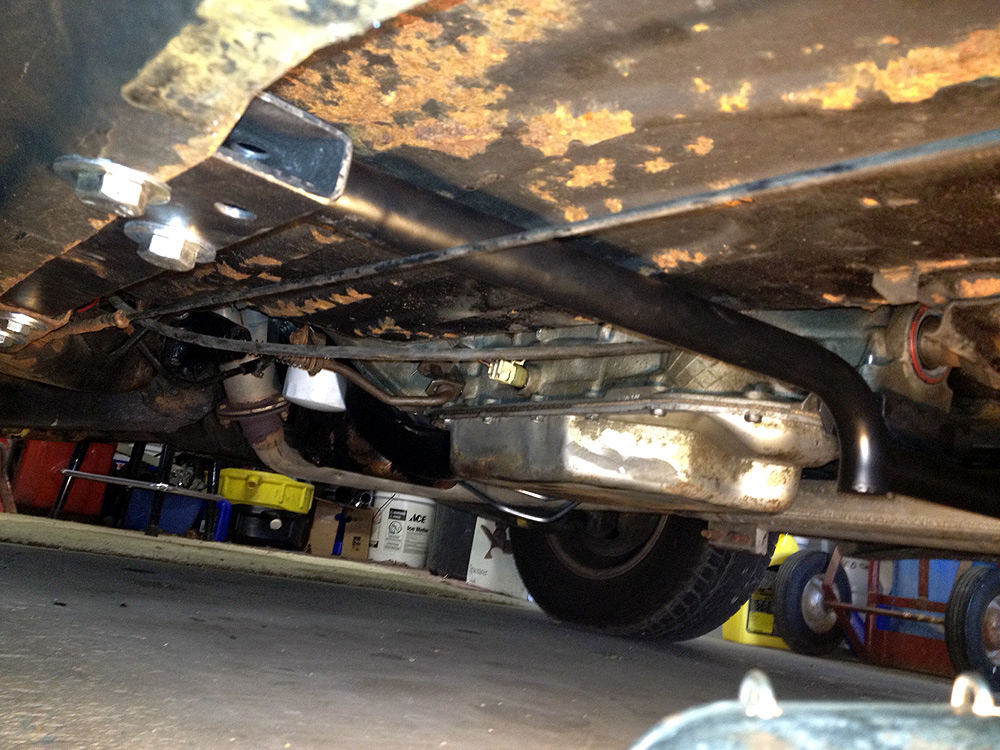
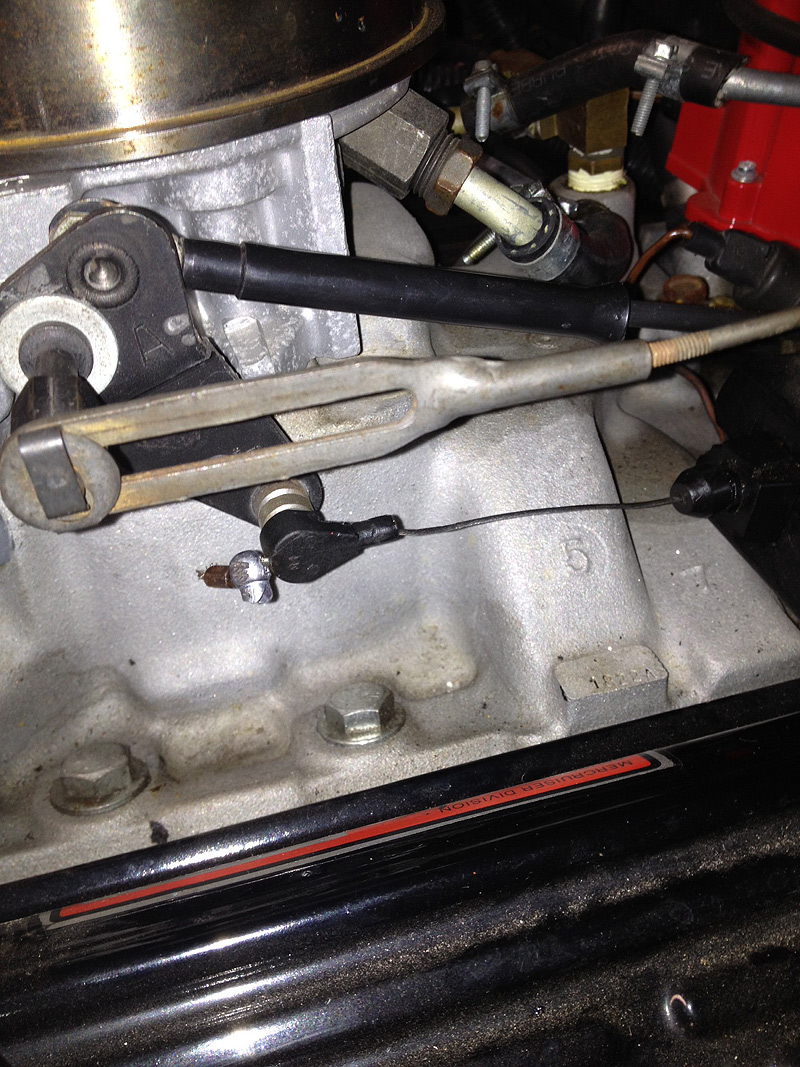
The only mod to get the shift cable supplied to work properly was a split shot on the cable. Not bad, considering this is the main control for the transmission. There could have been a lot more problems with geometry on this.
The speedometer reads 45 at about 25 or 30 mph. So I will have to be changing a gear to keep the lockup from kicking in too soon, and so the speedometer reads better.
No gears available any more. Will have to go another direction.
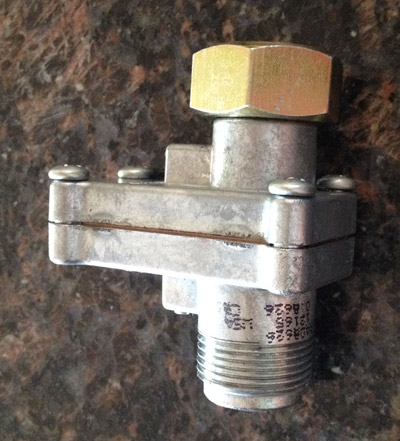
This is the speedometer Reducer gear. I followed Nate and he told me when I was going 40, 50, and 60. It was 45, 58, and about 70 on my dash. This worked out to about a 14% high reading according to Kerry at PATC where I ordered the reducer. It wasn't an off the shelf converter, so it had to be special ordered. Took about a month, because the company that made the cases just folded up, and they had to scramble to find another company.
It didn't work when I first got it. It locked up. Not wanting to fiddle with it, and after I paid $80, I sent it back. It arrived again on the 30th of June, and it was installed an working on the 1st of July, 2012.
I have been going rounds with the power steering pump. It was leaking, but, as with just about everything on this car, I have to figure out what the donor pump was to get a replacement. Tried 89 Firebird, then g-body Oldsmobile, with no luck. I think I have it narrowed down, using the casting number on the serpentine unit, to 1992-1993 Caprice part. I'll let you know on Tuesday 5/8/12 if it fit.
A OK with no leaks. it is a 1993 Caprice Serpentine system.


9/1/12
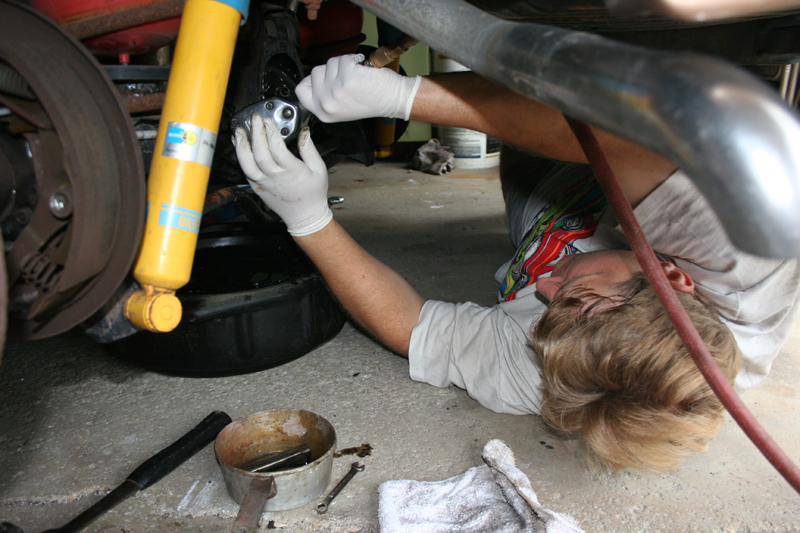
Robert Adams from the El Camino list came for another welcome visit to help the cripple get the posin installed. I wasn't entirely a supervisor, but Robert kept me in line, taking heavy work over when I started digging in. Thanks a ton!!!!


All put together and ready for a test drive. It was awesome to be getting the power to the ground again. Burnouts were controlled and short lived. It hooks up way better. Everything worked great. On to the U-joints project.
The u-joints were replaced with plenty of torching to get the original joints out. the loud "tink" sound I had on the 3-2 shift is gone. Success!
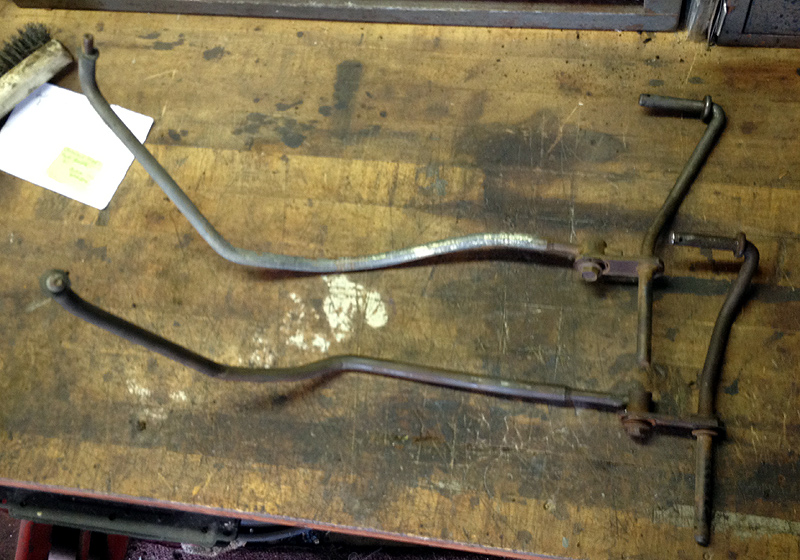
Score fron Craig's List. Chrome 200-4R cover to replace the 350C version cobbled to fit the new trans. $20 (I have seen them for 60 in plastic)
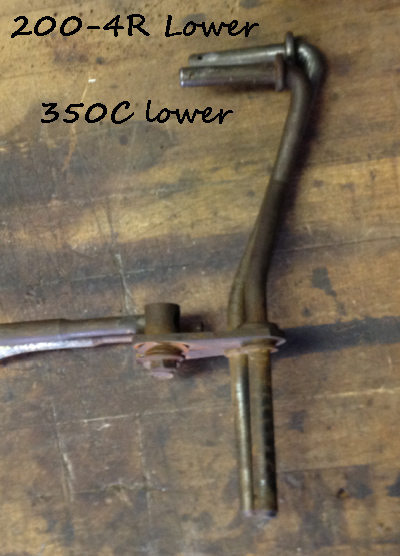
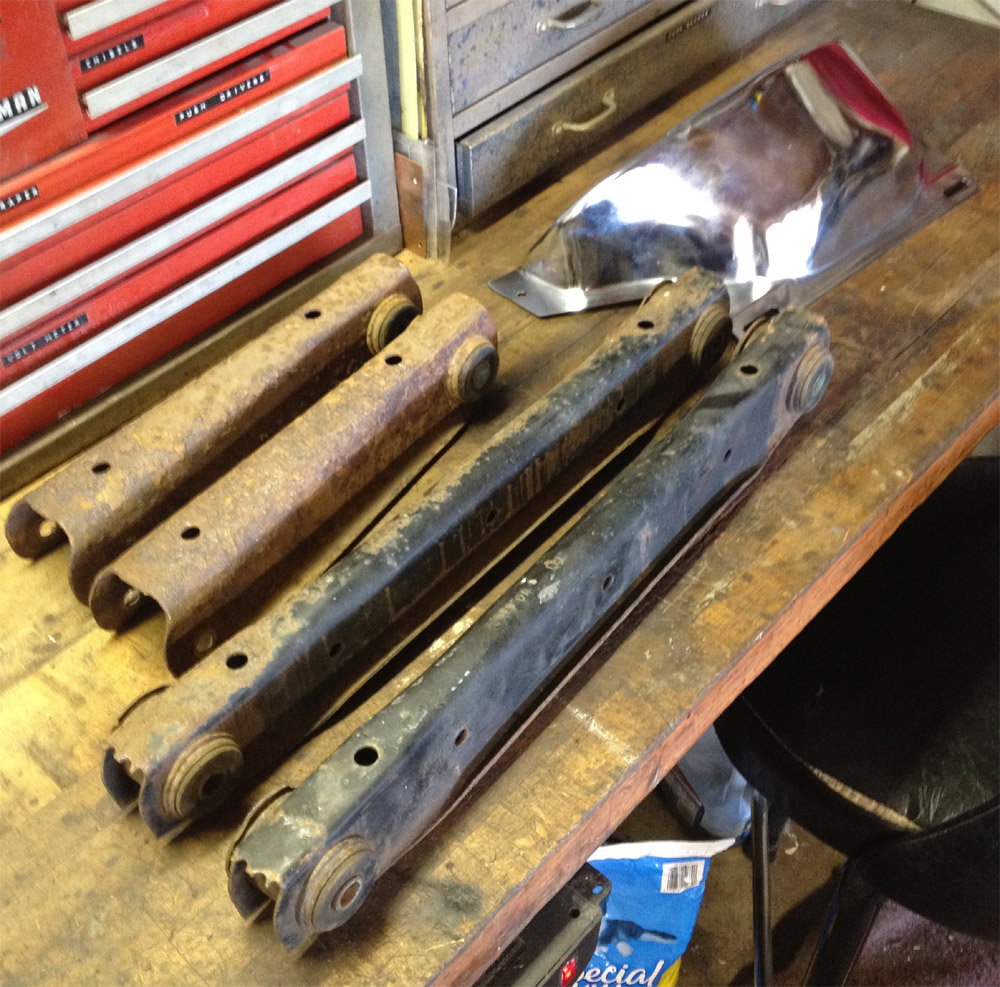
A set of upper and lower control arms from a Monte for $10. I will hold on to the uppers, but they are scrap. Mine are in better shape. I'll box the lowers, put new bushings in, and swap them painlessly when the time comes.
9/23/12
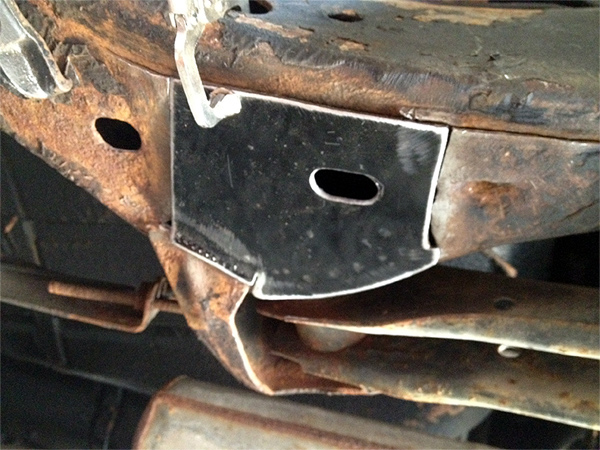
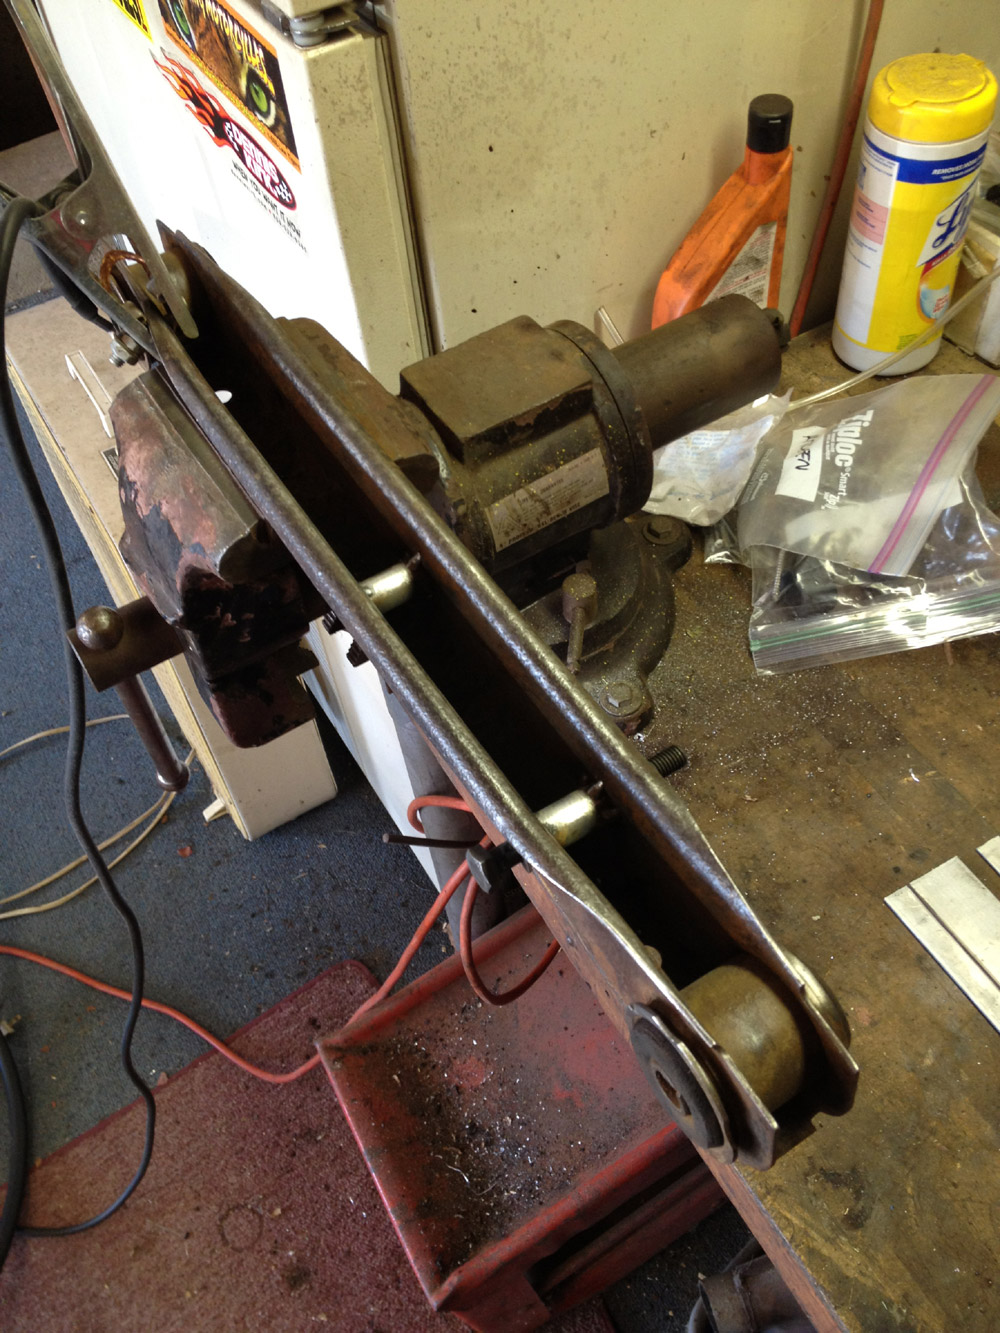
Here is the first one with the 3/8" galvanized pipe cut and welded in place for the sway bar reinforcement.
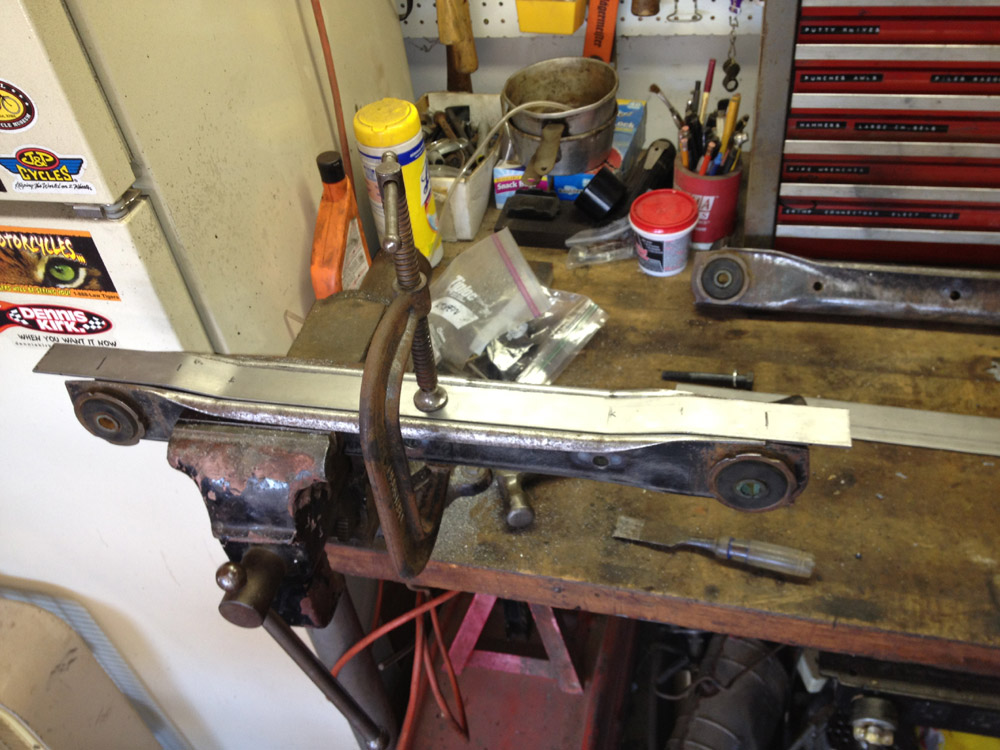
I tacked it, about every 2 inches, and worked from the center. Then bent and cut the ends to curl around and slip inside. Then stitched and filled in the gaps so I wouldn't warp anything.
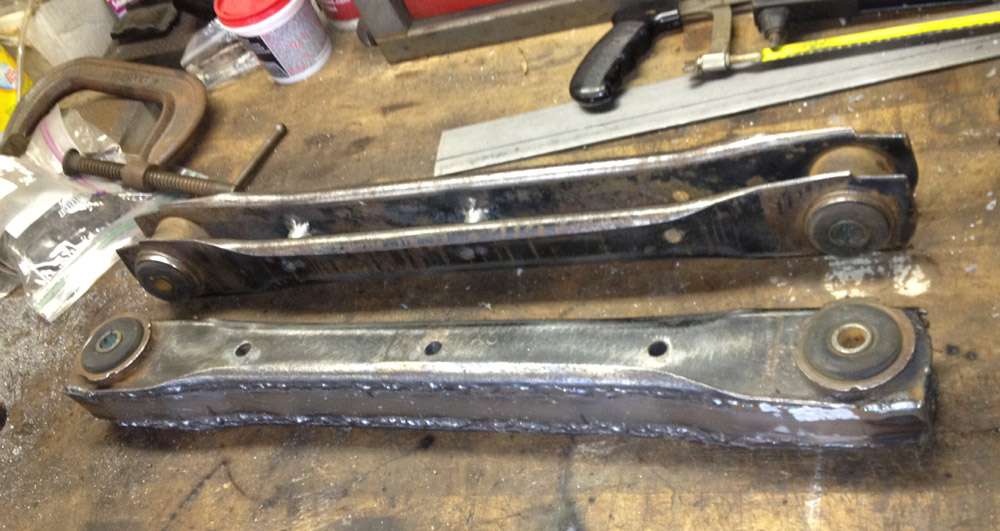
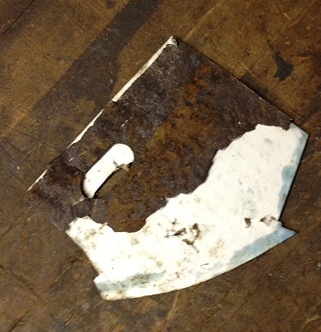
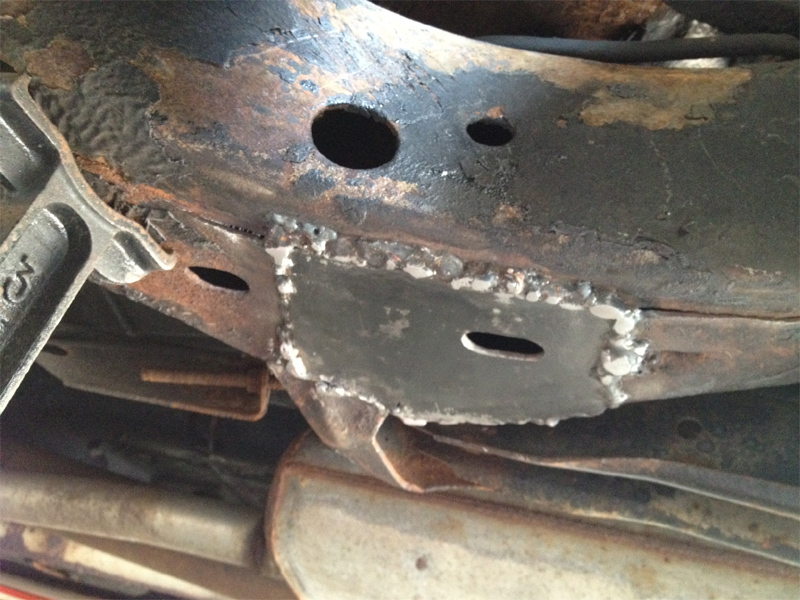
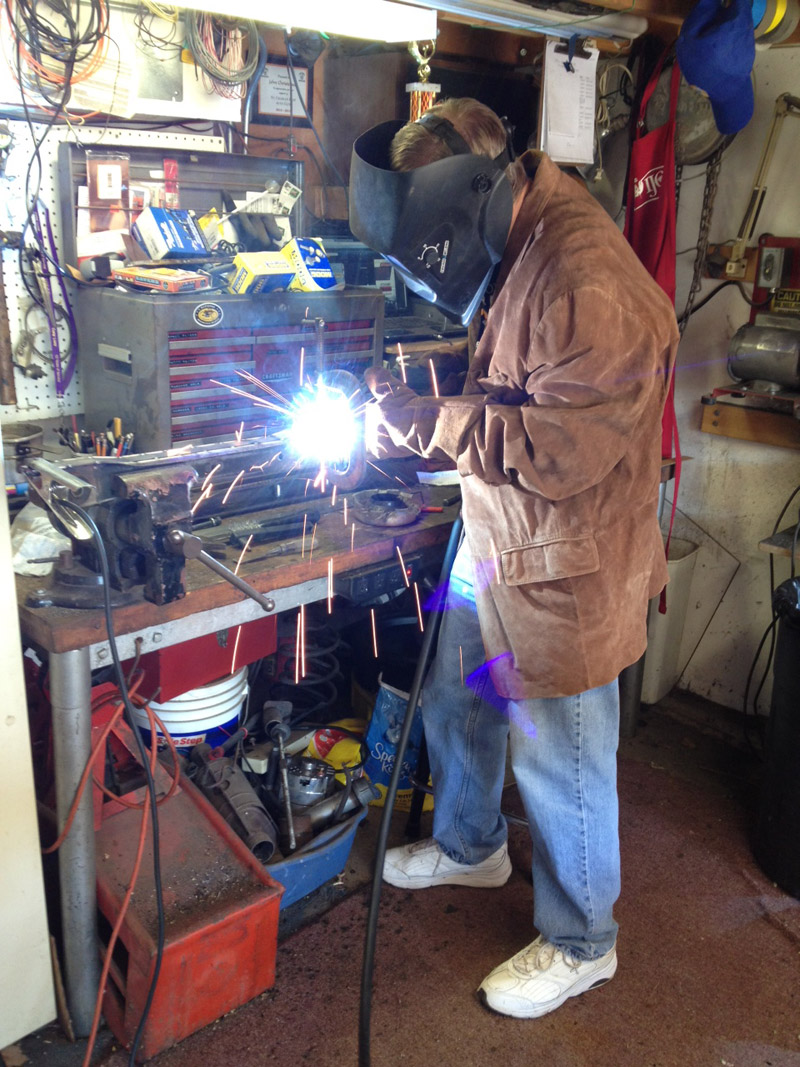
Here is another angle. I have the other one started, but ran out of Argon gas ..... I think my regulator is foul. I am running out way too quick. More on that as I get on email with tech support at Eastwood.
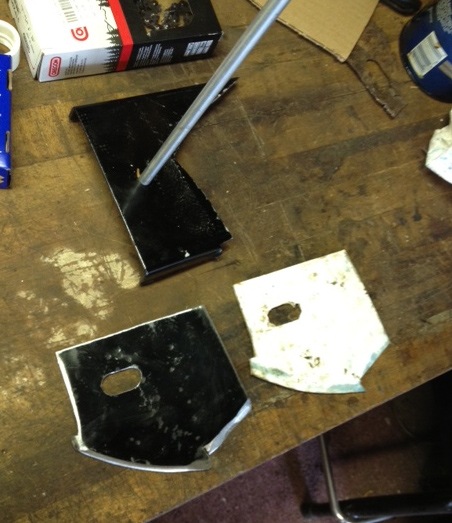
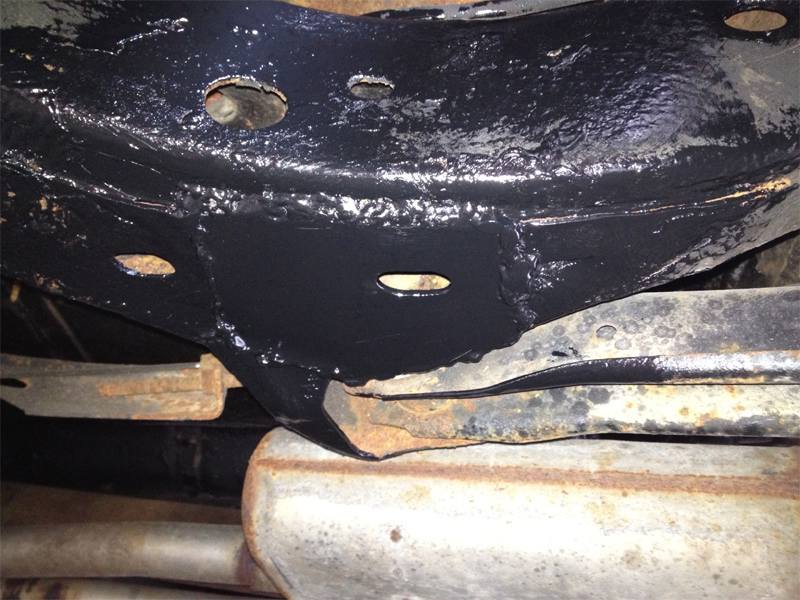
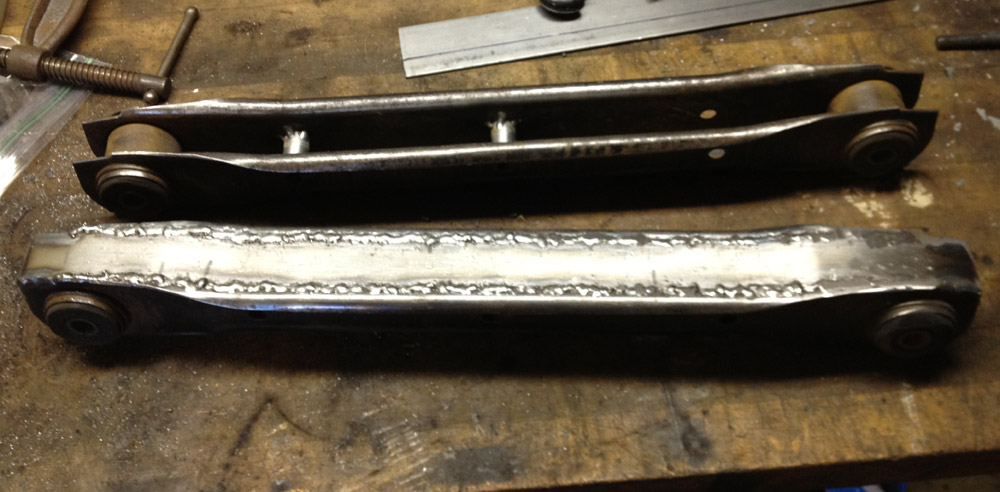
I pressed out the bushings on the first one, and will scrape, grind, and brush it to get ready for paint. The new bushings should press right in.

After they dry, I'll press the bushings in and they will be ready to go.

Thanks to the Saint Charles East High School Car Club for helping me get the control arms on the car on October 10th. I am still on a weight restriction (see the top of this page), and I could not have done this job without the help.
The Sway bar is now painted and back on. Nate helped me with that. I did get new grade 8 bolts and washers to put it on with. The others were pretty rough.
Recovery is almost complete, formal physical therapy is over. Still have a weight limit. Hope to get it somewhat lifted next month.
Purchased some big brake parts from Mike H on the ELky List. They will
get here when they get here. Police Caprice front spindles, 1LE Camaro Brake
rotors and calipers, Global West tubular upper A Arms, boxed lower control
arms, 1" lowering springs all around from Global West. I bought a Caprice
Master Cylinder, new in the box, Raybestos (39328).
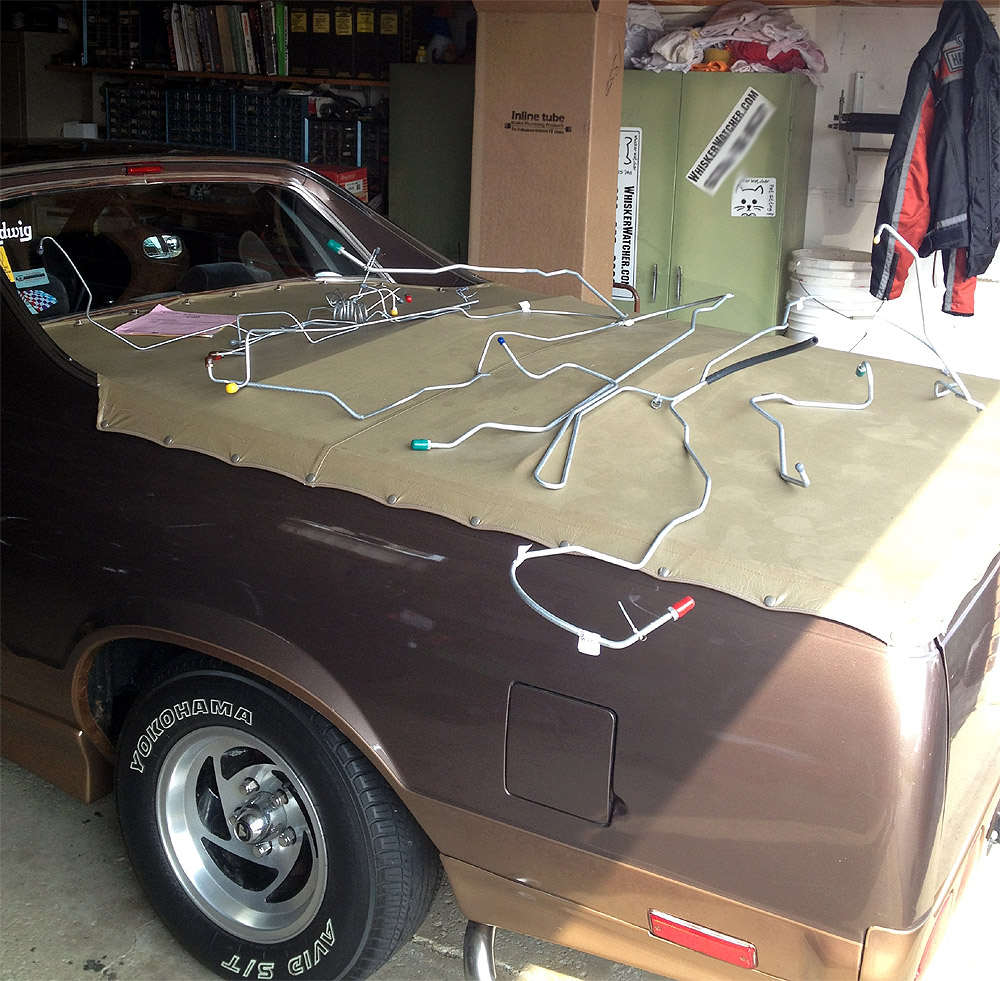
Pictured left are the new inline tube parts just arrived. All the brake lines,
and fuel lines for fuel injection. I drove it the other day, and could smell
gas. When it was up on the lift at the school, I found the source. It's a
weeping fuel return line, that used to be a vapor line. No need to go down
in flames after all this work! I Don't know when the change will happen,
but I at least want to change out the leaking line ASAP.
I changed the fuel line before the move, because I needed the use of the
Elky to load up with hazardous materials that would not go in the PODS.

We spent months settling in, and rehabbing this 100 year old house. The best thing is that I saved $1400/month on House Payments.
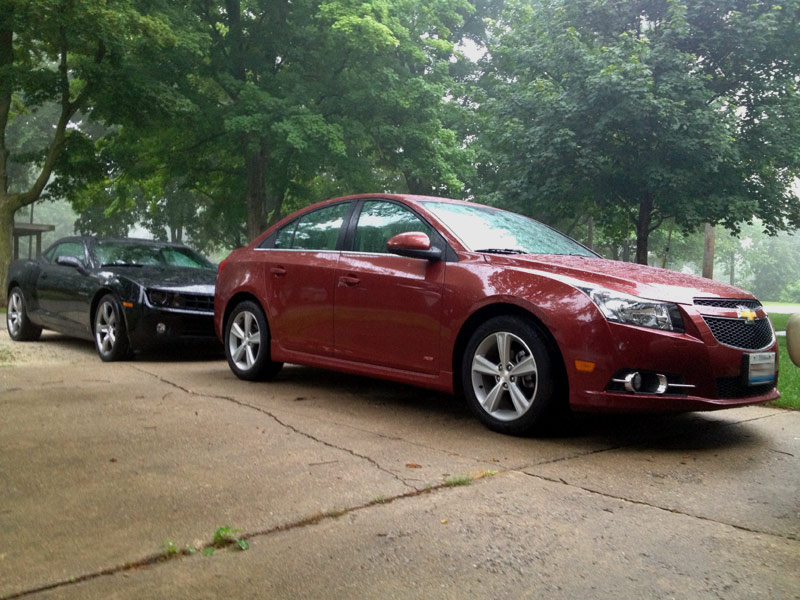
I gave my Brother in Law the 1999 Pathfinder we have owned for years, and was a great vehicle. That means I need an economical commuting car. Enter the 2010 Camaro 2LT, getting almost 30 mpg. We got the wife a 2013 Chevy Cruze the same day. Happy 33rd Anniversary to us!
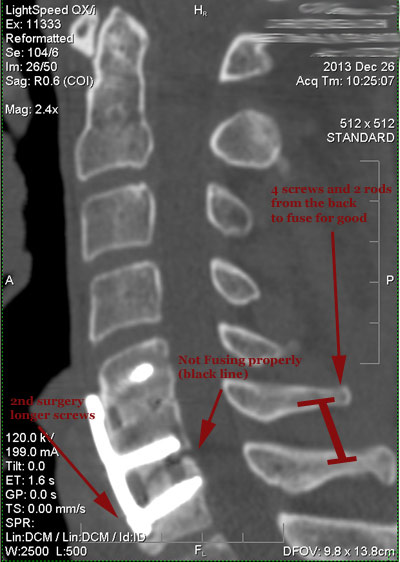
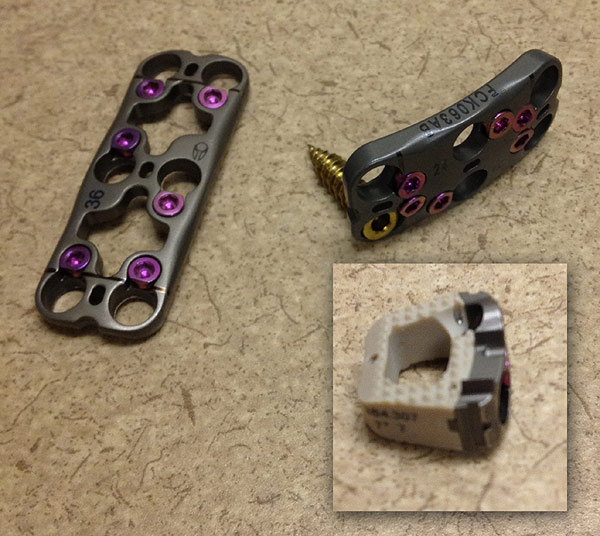
I had to go in and get screws and rods in the back of my neck for C-6 to C7 in January 2014.
This seems to be working as of 3/22/14 I have woken up with no pain at least a couple days, for the first time in 2 years. Waiting for about 6 months when I can lift more. It will be a year (Jan 2015) till the weight limit comes off.